setting up vdi with windows server

summary⌗
i expect for most of you to already know how to setup everything except VDI, so i wont go into detail about anything other than the VDI. there is many more detailed and better guides out there for that stuff.
basic topology⌗
in this deployment, we will have 3 windows servers (i am using windows server standard 2022), and 1 switch (2 if you want WAN access through the VPN)
all of the servers are on the same private switch
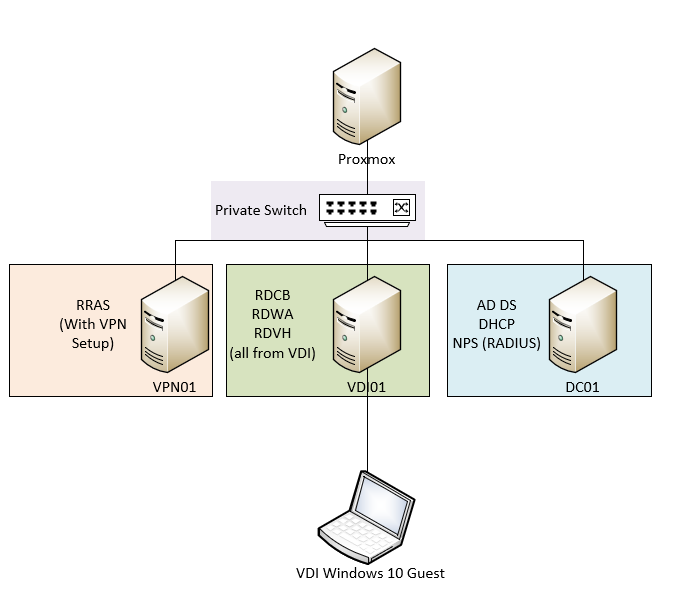
| server name | IPv4 address | roles | domain joined? |
|---|---|---|---|
| VPN01 | 10.0.100.1/24 | RRAS (VPN setup) | no |
| DC01 | 10.0.100.2/24 | AD DS, DHCP, NPS (RADIUS) | yes |
| VDI01 | 10.0.100.3/24 | VDI (RDCB, RDWA, RDVH) | yes |
setting up vdi on VDI01⌗
prereqs⌗
-
make sure VDI01 can do nested virtualization
- for proxmox, follow this article: “Nested Virtualzation - Proxmox VE”
- for hyperv, follow this article: “Run Hyper-V in a Virtual Machine with Nested Virtualization”
-
if you are using hyperv, make sure to enable mac address spoofing on the private switch that the three virtual machines talk through. (the one at the top of the diagram above labeled “Private Switch”)
- follow this article: “Nested Virtualization Mac-Address-Spoofing”
-
make sure it can talk to DC01, (ping or whatnot)
-
make sure that the DHCP server on DC01 has a pool and is working correctly
-
make sure the server is domain joined
-
make sure you are logged in as a domain user ( NETBIOSHERE\Administrator for example )
-
make sure you have enough storage for multiple vms (128gb - 256gb). it will not be able to create them without it.
-
make sure you have enough ram on the VDI server to have multiple vms (8gb or 12gb of ram is probably good enough for a few vms)
vdi role installation⌗
- click “add roles and features”
- click “remote desktop services installation”
- choose “standard deployment”
- choose virtual machine-based desktop deployment
- press next
- add
VDI01.your.domain.comto the selected computers by clicking the arrow button
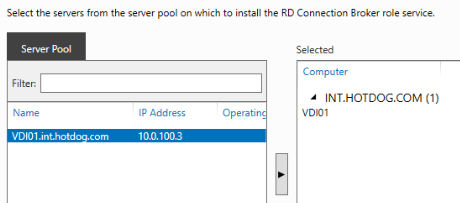
- press next
- do the same for the “rd web access server”, add the
VDI01.your.domain.comto the selected computers - press next
- do the same for the “rd virtualization host server”, add the
VDI01.your.domain.comto the selected computers - press next
- make sure you select “restart the destination server automatically if required”, and then click “deploy”
creating a reference image with sysprep⌗
for vdi, we need to have a virtual machine that we use to act as the guest’s computer when they connect to the VDI.
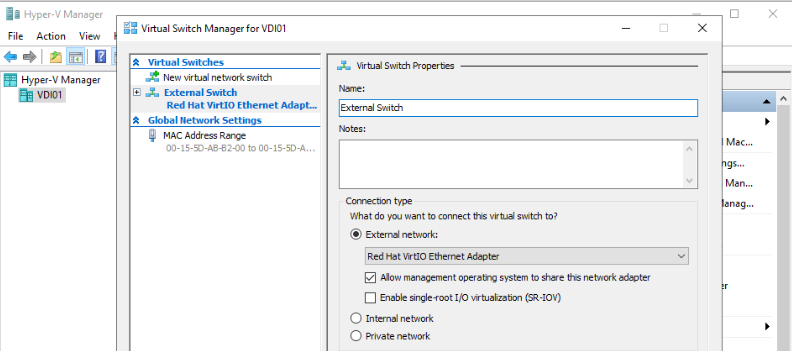
- open up hyper-v manager
- we need to create a new external switch, for the vm to talk to the rest of the network
- click virtual switch manager
- create a new switch with the type “external network”, and use the same network adapter as the one that connects to the rest of your internal network with the domain controller on it.
we then need a new windows 10 (or 11) virtual machine to have a copy from
- name it something memorizable like “Staff-Master”
- make sure to select an enterprise version of windows (like education, or enterprise)
- make sure to use that newly created switch
- setup the windows install and get it into the desktop
- MAKE ABSOLUTE SURE that you get a DHCP ip address, and that you can talk to the domain controler inside the vm. if you can not, future steps will fail.
- MAKE SURE YOU CAN TALK TO THE DOMAIN CONTROLLER, AGAIN. BE DOUBLE SURE.
- make any needed changes, like installing software. for testing, i created a new folder on the C: drive and a new text file inside.
- go to the C:\Windows\System32\Sysprep folder
- shift right click the empty space and select “open powershell window here”
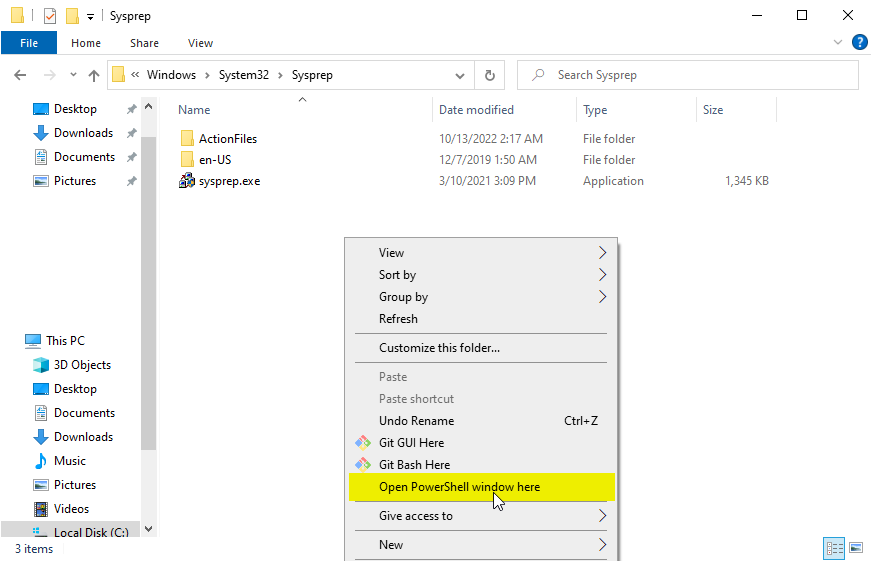
- in the window, enter
.\sysprep.exe /generalize /oobe /shutdown /mode:vm - wait for it to finish and shutdown, DONT turn back on the virtual machine
we now have a sysprepped virtual machine for the VDI clients.
configuring vdi⌗
we need to have an OU in the active directory for the computers to live in, if you created the traditional “your.domain.com” OU at the top level, you can just use that.
for a real environment, we should organize them better and put them where they belong, but for this test environment, it doesnt matter.
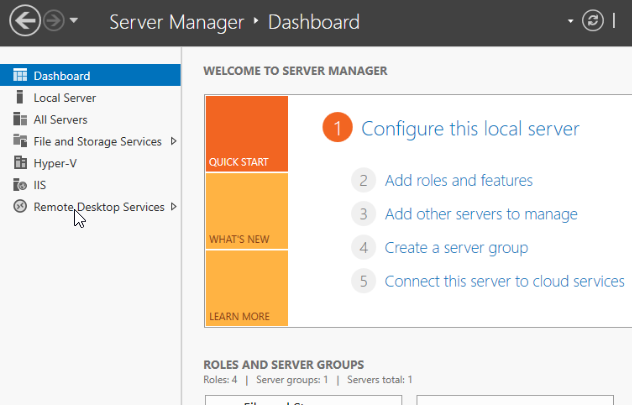
- click on “remote desktop services”
- click “tasks” next to the “deployment overview” box
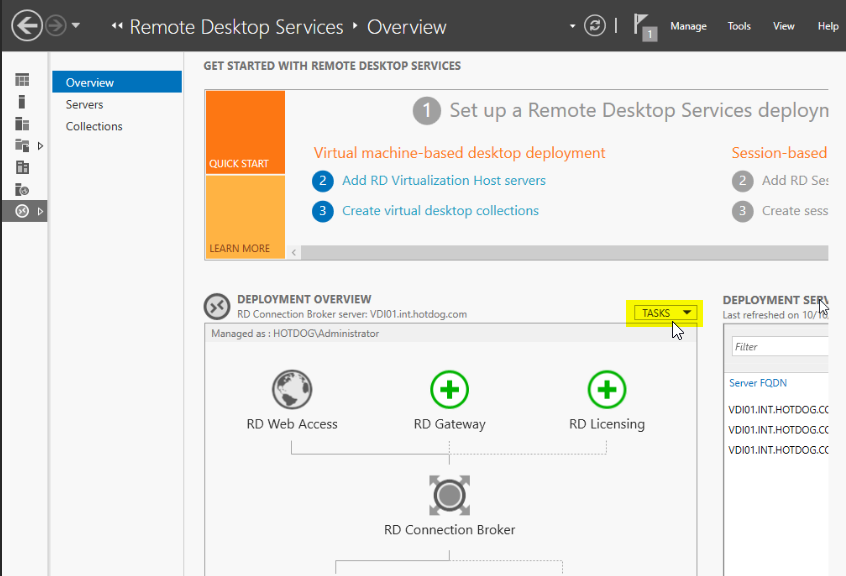
- click “edit deployment properties”
- click “active directory” on the left
- select your domain
- select the organizational unit, for me, i selected
your.domain.com, as i already had it created. this is an OU inside my active directory. - it will say a permission error, you can fix it by clicking “apply”
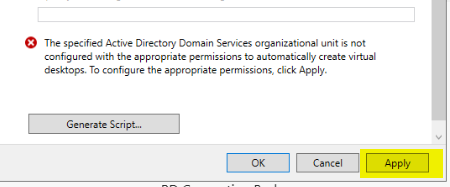
we now have the correct permissions to continue to create the virtual desktop collection.
- select “create virtual desktop collections
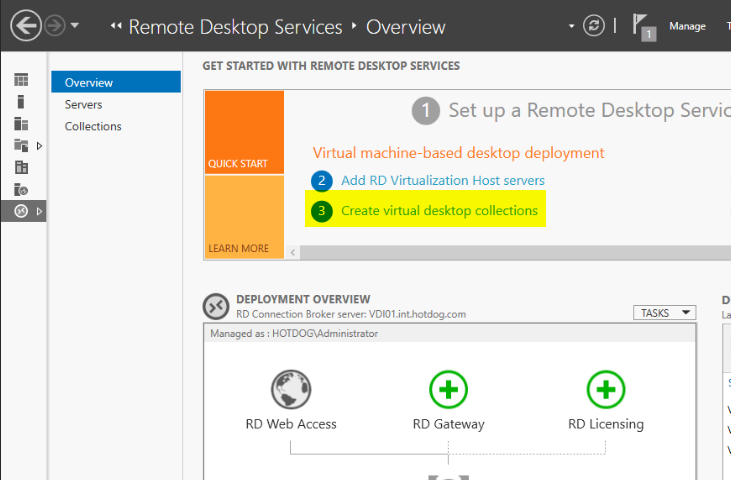
- give it a name, this is the name that will be given when people connect to the pc. i have mine “Staff”
- select “pooled virtual desktop collection”
- select your master VDI image we created earlier, for me, its called “Staff-Master”
- select “provide unattended installation settings” and press next
- select your active directory, and then select the OU you added permissions for earlier. (i had to select “-” for some reason, not sure why)

- specify the virtual desktops to be created, i selected 2. change the prefix of the machines. i used “Staff-” and a suffix of “0”
- next
- you can specify a new place for storage, but the defaults are fine. make sure you have enough storage on the VDI server for multiple vms to be created (probably 128gb or 256gb is good)
- you can disable “enable user profile disks”, as we dont really need them for our testing purposes. you can specify a path if you do want them however,
- click create
check hyper-v to make sure that the vms are created, and you can also check the “networking” tab to see if it got an ip address from the dhcp server
success?⌗
you should now be able to access the rdweb portal. go to the ip address of the server, 10.0.100.3

- go to the ip address with /rdweb appended to the end of the ip
10.0.100.3/rdweb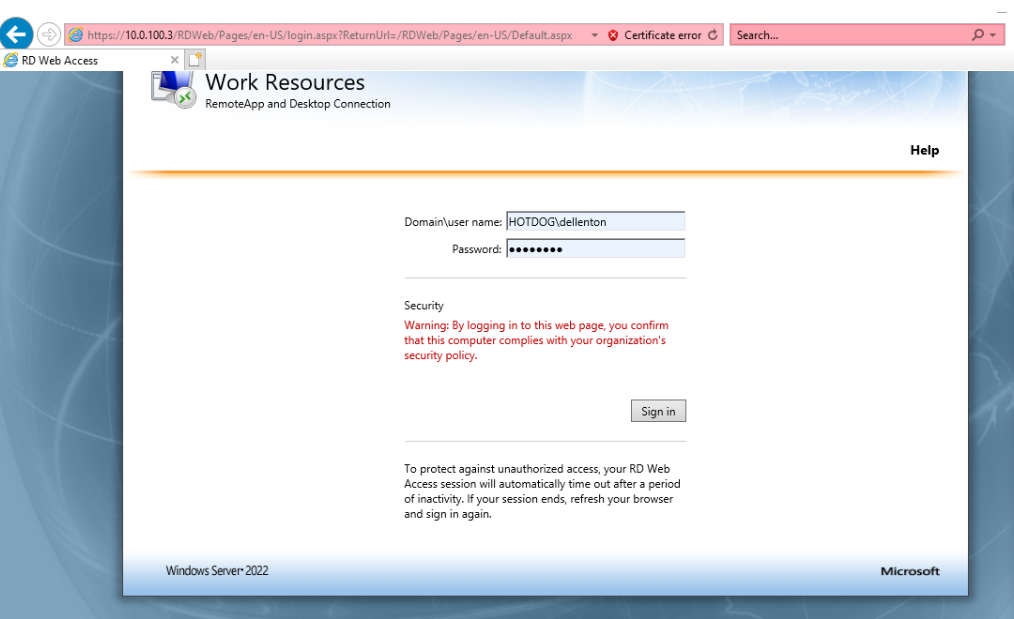
- login with your domain credentials

- click on the “Staff” collection
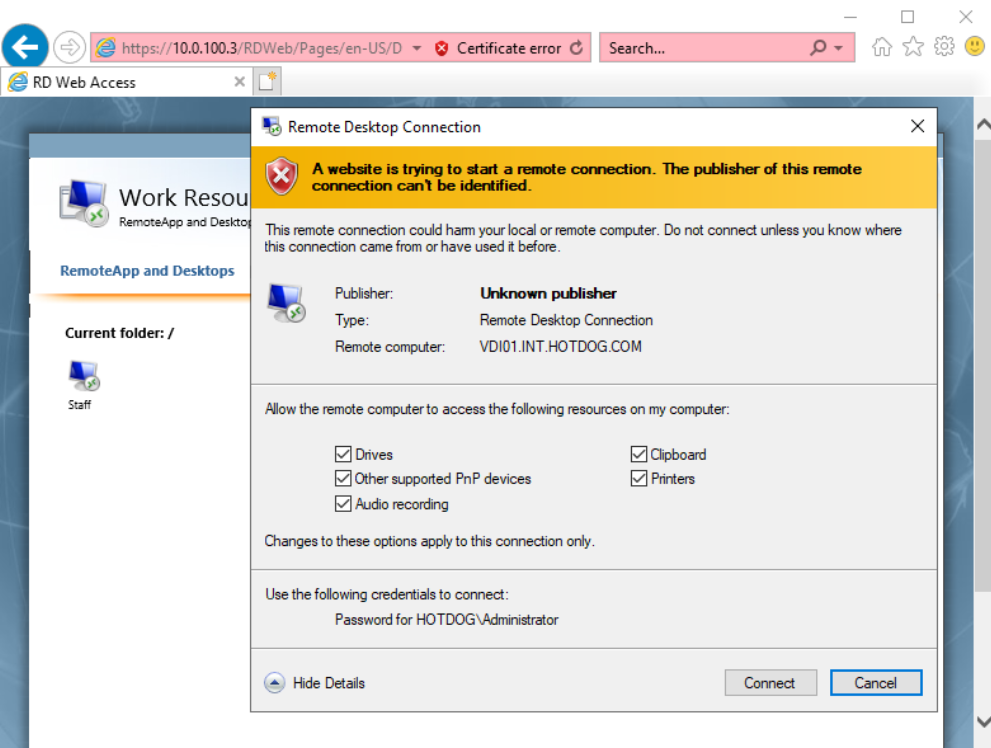
- click connect!
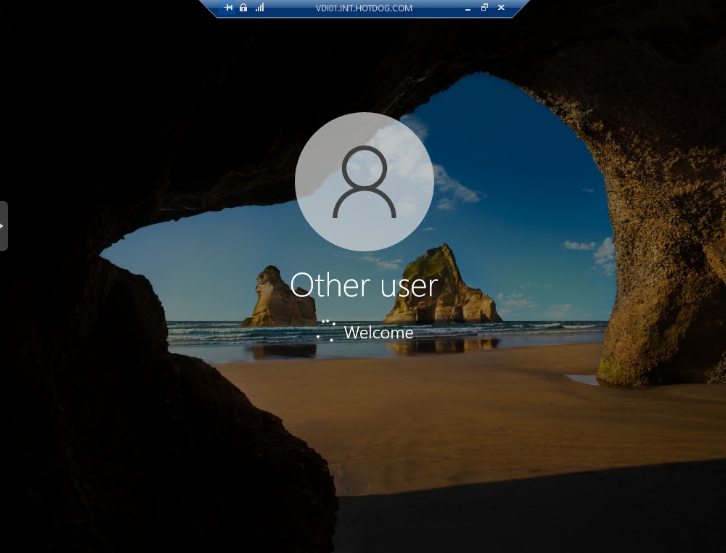
you should now be connected!
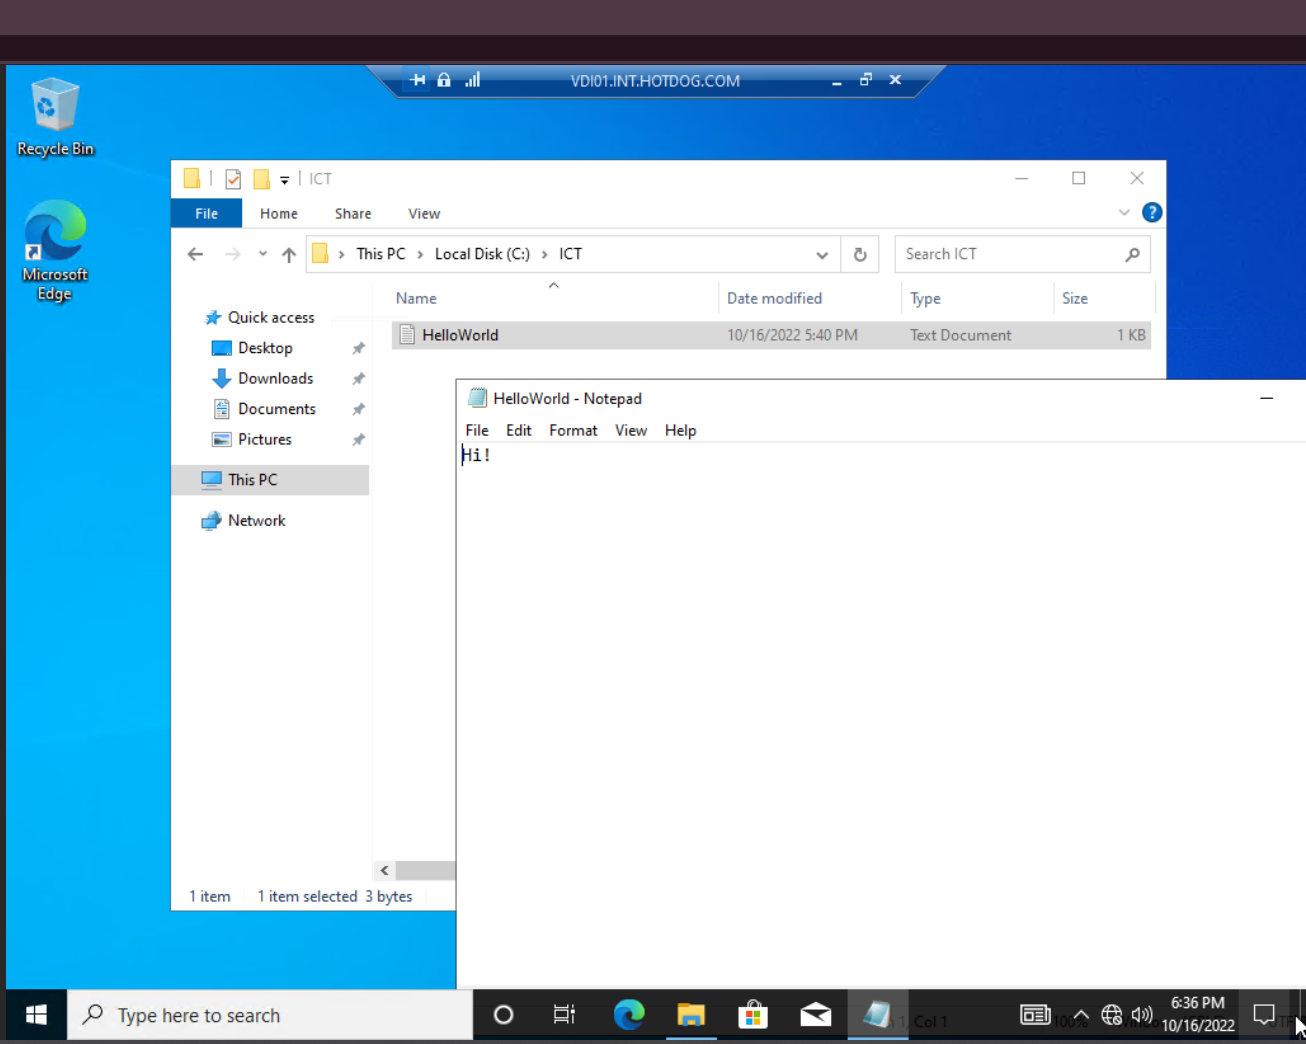
we can see the file I created earlier when I sysprepped the “Staff-Master” machine
you should now have a working VDI infrastructure! :)⌗
hope this helps!